Having a rummage around in the 'german' model draw, I found one of my original attempts at german 'splinter' style camo smocks (a crewman from the fast build Italeri PAK40). It was interesting looking back and seeing how I'd improved.
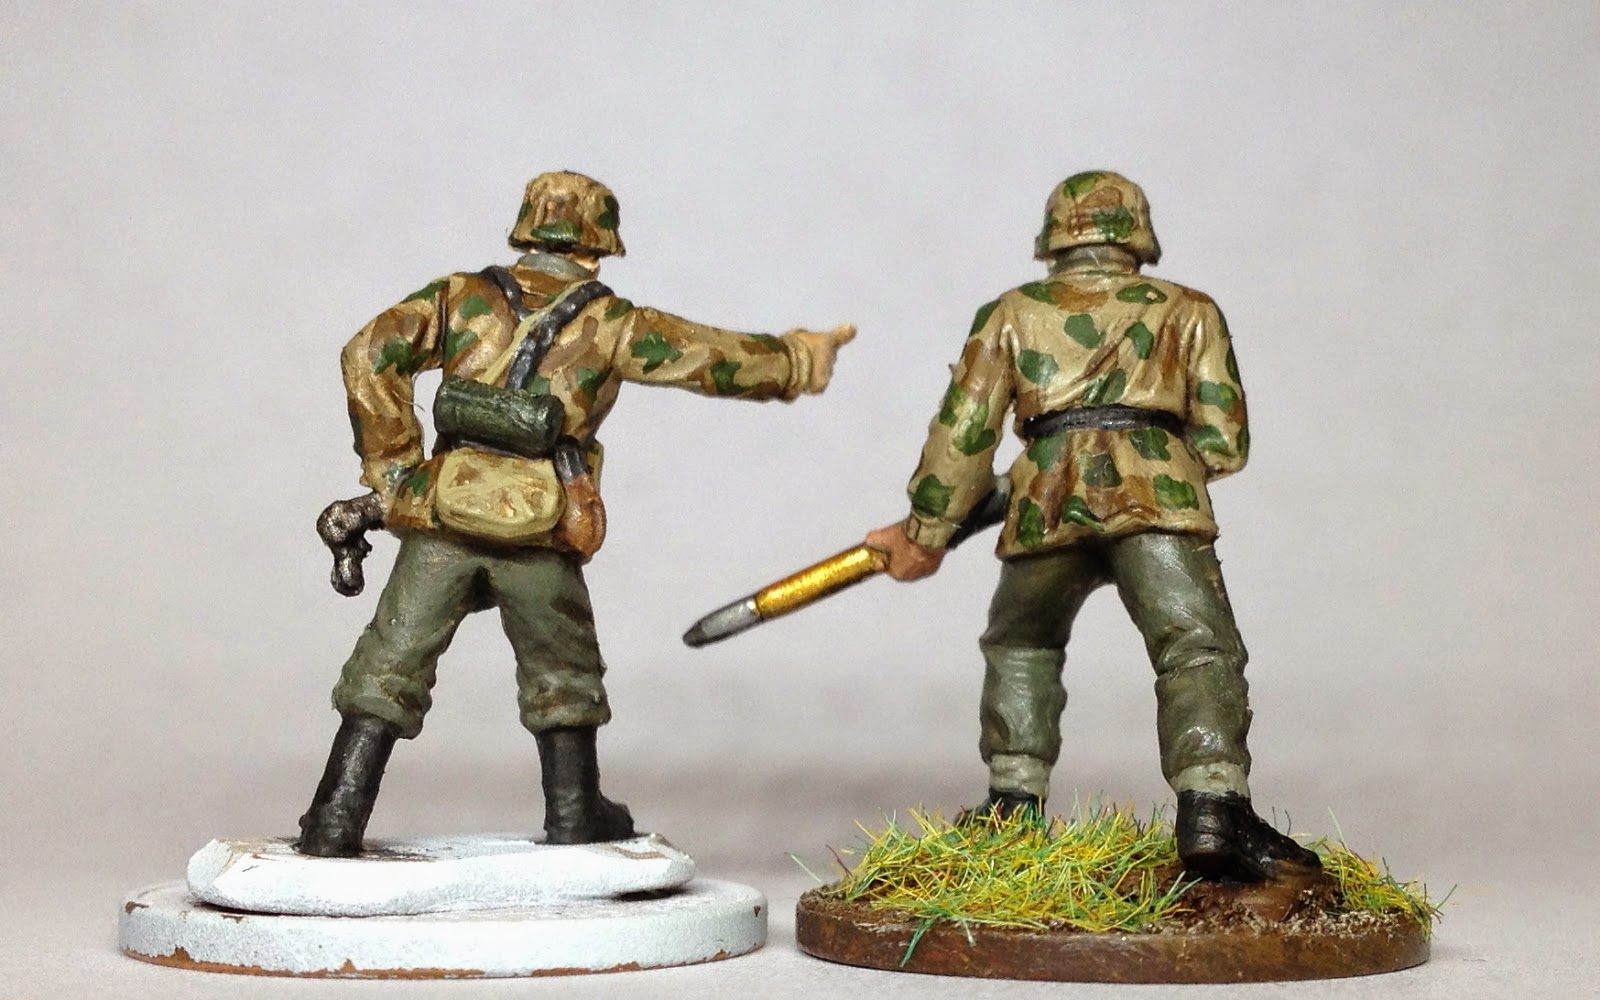
Caesar Panzergrenadier on left, Italeri PAK40 crew on right
Now, I'm not saying my recent efforts are perfect, far from it, but it did make me decide to record the process and my thoughts on it and stick it on the blog. It might be useful to someone but also I'd welcome feedback from anyone who reads this. Suggestions of alternative patterns, techniques or colours would be more than welcome!
I'm not going to go into a lecture about German WWII camo patterns, it's a ridiculously complicated and thankless task! Nonetheless, the main improvement came from looking at photos and pictures of the patterns. There were a couple of key things that stuck with me:
- The angular pattern
- That the brown and tan colours dominated
Later 'Marsh' pattern is slightly different, with a less angular pattern and the green more dominant.
So here goes... The unfortunate model in this case is another Caesar Panzergrenadier. All colours are either Vallejo or GW.


The smock is basecoated with German VJ Camo Beige over a white undercoat. (The rest of the uniform is VJ Field Grey).


The first camo pattern was added using VJ German Camo Medium Brown. I kept the patterns quite large and as angular as I could get them.


Green patches added in VJ Luftwaffe Camo Green. These were kept small and used to fill in 'hollows' in the dark brown. The overall effect should still be of mainly beige and brown.


A wash of GW Devlan Mud for shade.
.JPG)
.JPG)
Rehighlighted with the original base colours. The camo smock only got the very lightest highlight with the beige on the edges of the smock and helmet.
So there we are. Any comments, critiques or suggestions more than welcome!
Your new version really does look better than the Pak 40 crewman.
ReplyDeleteDid you mean to leave out the chin straps on the helmets?
Would you consider using a dedicated flesh wash as well as an overall wash of Devlan Mud?
Do you apply a matt coat after the wash?
I always seem to forget the chinstraps until I see them on the photo!
DeleteThe Devlan mud wash has the advantage of shading everything in one go, but does leave the faces dark. I'll try a flesh wash next time though and see how it goes.
After I have a batch done I'll give them a spray of matt varnish, but I haven't on this one yet, which leaves it a bit glossy at the moment.
Thanks for the feedback!
Alan
Its good Alan. Well done.
ReplyDeleteAlways good to look back and note any improvements.
Thanks Paul. Photographing them always results in spotting things I've missed as well (like the Sarge's comments on the chinstrap!)
DeleteThanks for the tips; looking good. Pea muster will be a real eye bender.
ReplyDeleteI've studiously avoided attempting it so far, but I know I can't avoid it forever!
DeleteNice work Alan. Thanks for the tutorial! I might use it for some German Paratroopers I want to buy. :)
ReplyDeleteThanks Thanos! Your SS camo was excellent, so I'd love to see what you can do with paratroopers.
DeleteLovely work - I always have a very hard time with German camouflage on figures. Your post has made me want to try it again!
ReplyDeleteSmashing Alan, very nice
ReplyDelete